Never Attends – step-by-step tutorial pdf file
Never Attends must be submitted in mystarkstate.
This tutorial is for W3 and W4 instructors who need to determine online student attendance.
In order to be considered an active student and to avoid being removed as a Never Attend, a student MUST have completed an activity in the course.
Examples include:
- completing a discussion post
- submitting a homework file
- finishing a survey, assessment, quiz or test
- completing any other activity that requires active participation and could be graded – it doesn’t have to be graded
Determining Never Attends has never been easier! Use the Retention Center and the Full Grade Center to determine attendance.
Directions:
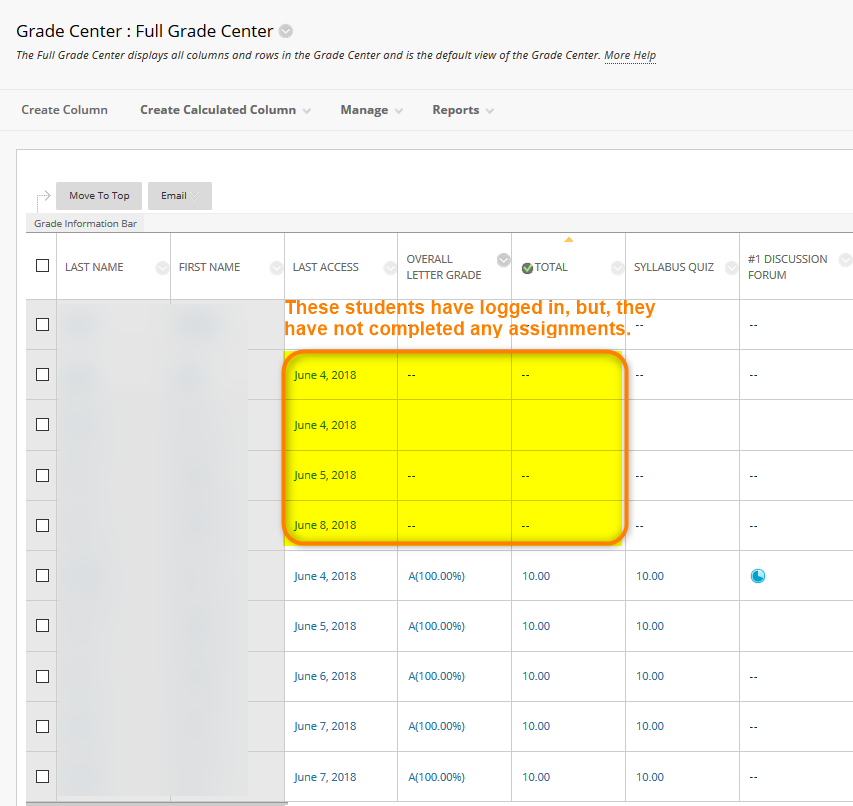
- Go into your course and navigate to the Full Grade Center.
- Click the Last Access title to reorder the students by date of last access.
- If there are any blanks in that list, the student has never logged into the class.

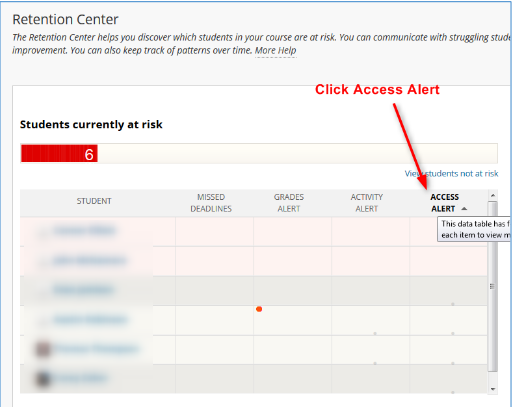
- To further verify that this student didn’t attend, let’s check the Retention Center. Under the Evaluation section, click on Retention Center.

- Click on the Access Alert column.
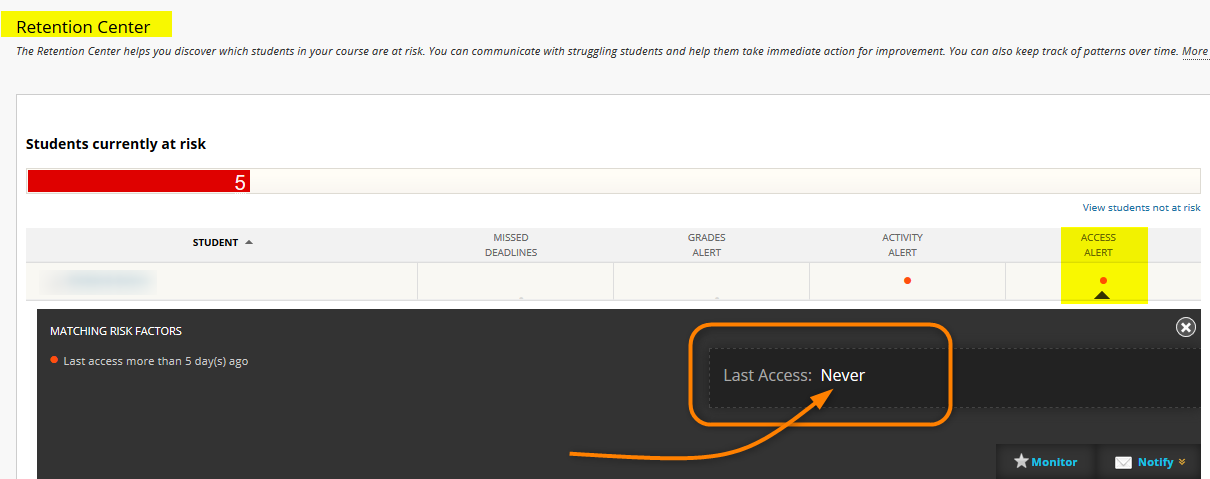
- Click the Red Box at the top.
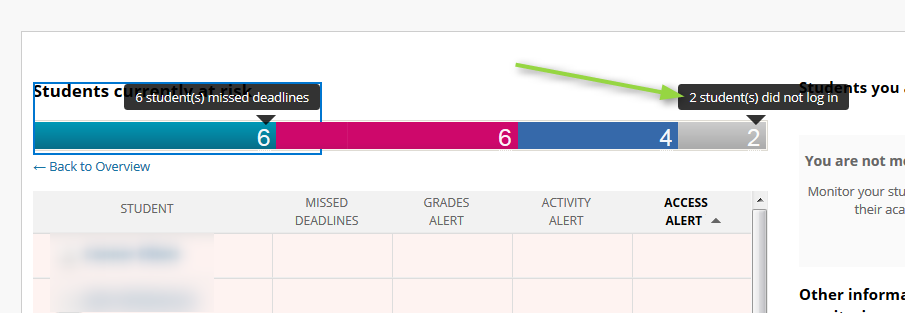
- The colored bars at the top indicate how many students Missed Deadlines, have Grade Alerts, Activity Alerts and Access Alerts. Pass your mouse over the Access Alert box and a pop-up message will appear telling you how many students haven’t logged in.
- After clicking the box on the far right, the Access Alert box pops up. Click on the number on the right side of the box for more detail.
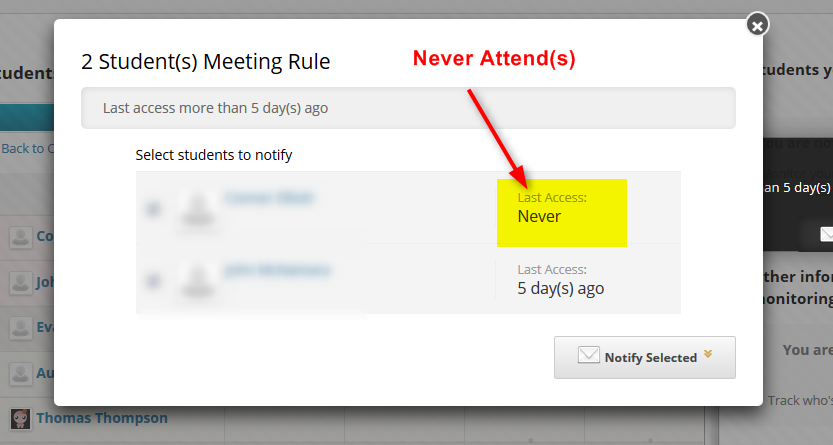
- You might see something like this. This pop-up window will tell you the last time students accessed the class. In the example below, one student has never accessed the class and one student hasn’t accessed for five days. The first student is a Never Attend.
- To be sure you have accurately assessed all students, check your gradebook to verify student grades by visiting the Full Grade Center.
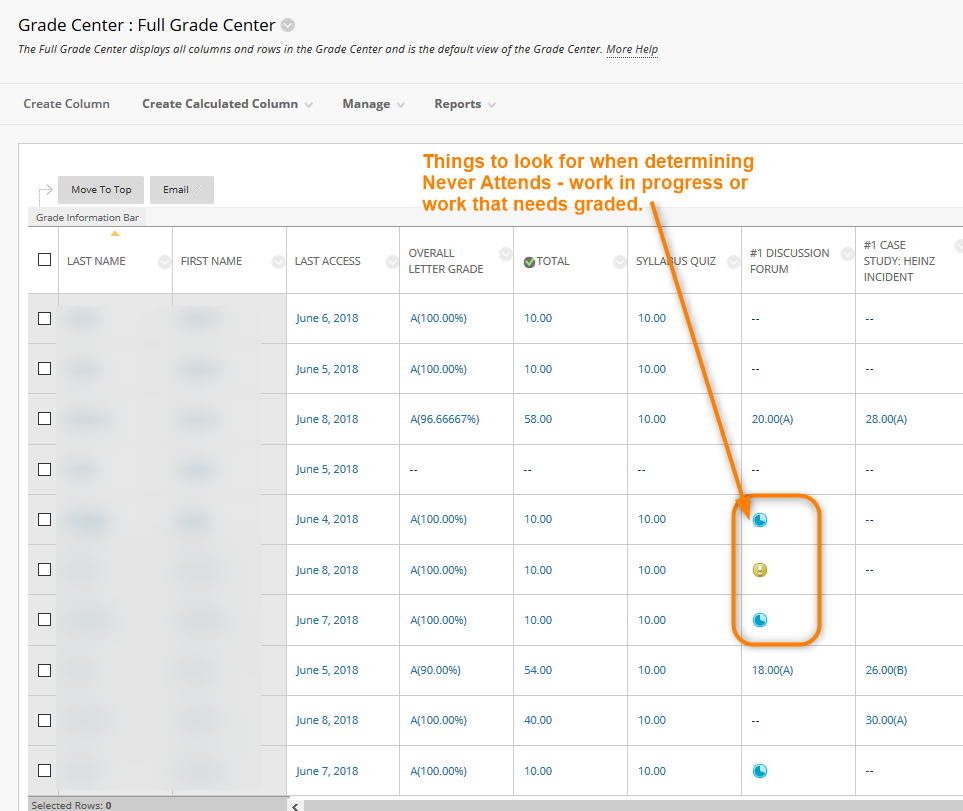
- A quick glance at any Total column will tell you if the student has submitted any work. In this example, the students have submitted work. If the Total Points were zero, they would be marked as Never Attends.
Check Needs Grading
You want to be sure you’ve checked to see if you have ungrades submissions before you make your Never Attend submissions.
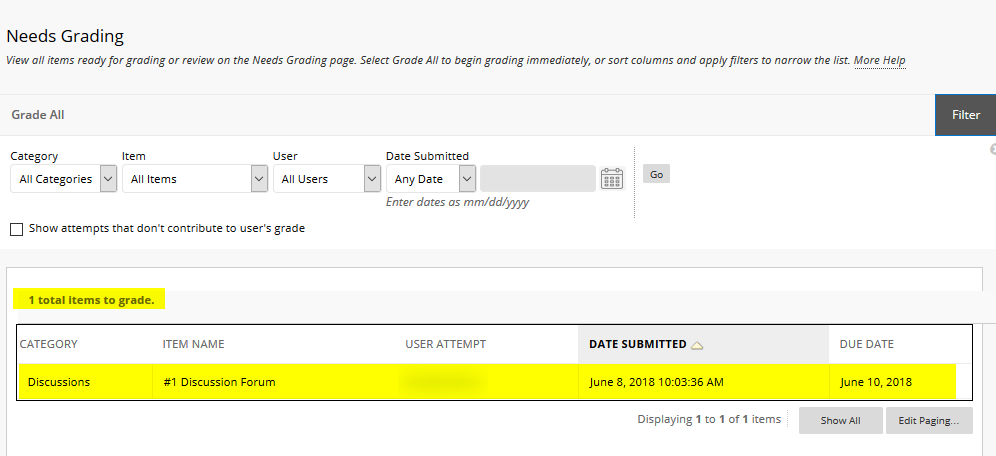
- Navigate to the Grade Center > Needs Grading.
- Check to see if you have any items which need to be graded before you submit your Never Attends.
- Finally, go back to the Full Grade Center and review the assignments that were due before the Never Attend Drop Date. If you see an indicator like the blue circle below, that means the student has started something they didn’t complete or submit. Reach out to them and encourage them to submit the item. If you see the yellow circle with the exclamation point in it, that indicates and ungraded item. You’ll want to grade that item.
Check All Student Submissions
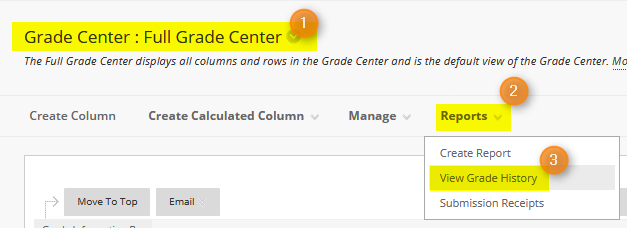
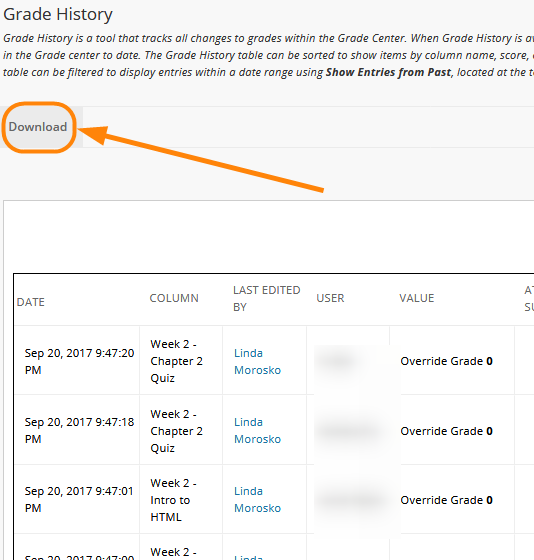
For more information on EVERYTHING submitted you can run a Grade History report.
- Go to the Full Grade Center, click the Reports link and choose the View Grade History option from the dropdown box.
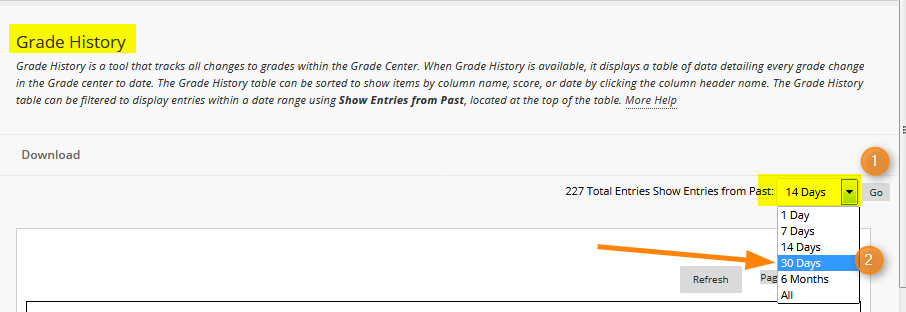
- Choose the appropriate number of days to review from the dropdown in the upper right corner and click Go:
- A list of student activity will appear in the window:
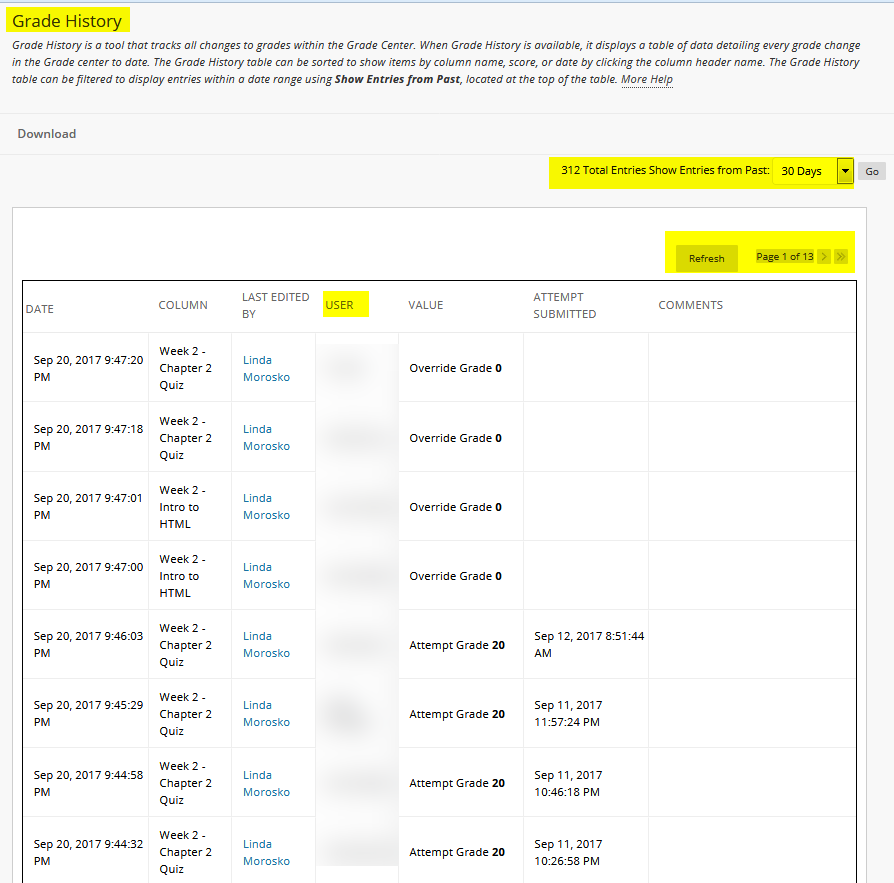
- The easiest way to see and manage the list of data (there are 13 pages of data here) is to download the file to Excel. To do that, click the Download link at the top of the list:
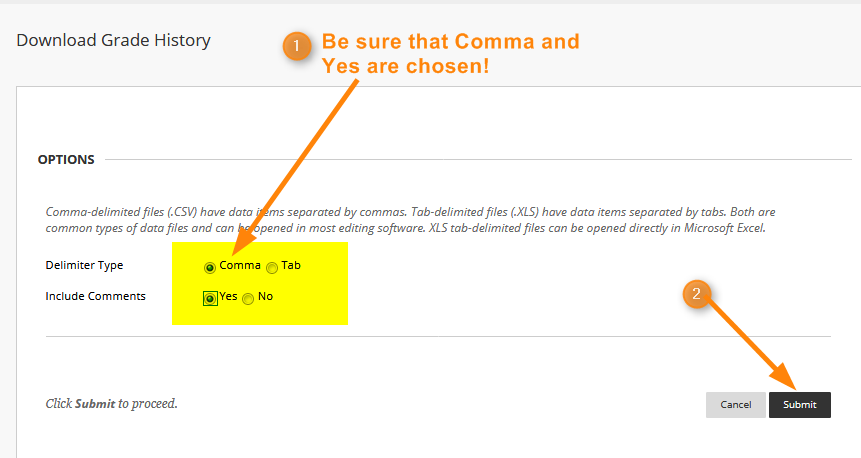
- Change the Delimiter Type to Comma and the Include Comments to Yes. Click Submit.
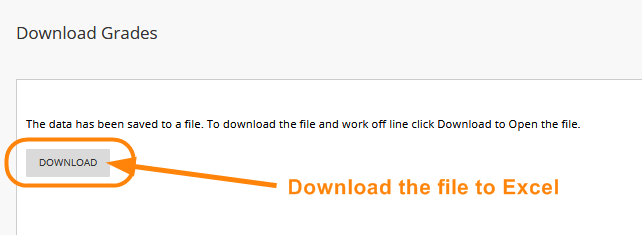
- Click the Download button to download the file to Excel.
- The following window will appear, be sure Open with Microsoft Excel is chosen and click OK.

- Sort the data by User so you can view one users submissions.
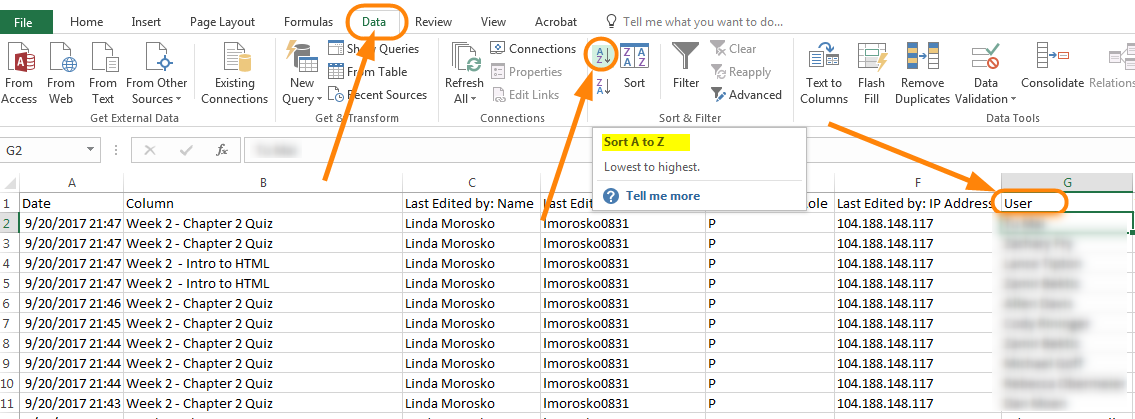
- You are now able to view student submissions:

Students who have been dropped for Never Attends, will still show in this list. You will be able to see if they submitted any discussion forums or other work.
~eSS