Recording sessions in Zoom is easy! Here’s what you need to know. There are two ways to record sessions in Zoom. Either by manually pressing the record button when your session begins, or setting it to automatically record when the session starts. For recording class lectures, we recommend using the auto record option.
Manual Record
- To manually record a Zoom session, press the record button on the Zoom toolbar to begin recording.

- After clicking the Record button, a menu with two options pops up. Decide if you want to save the recording to your computer (recommended) or, if you want to save it to the Zoom Cloud. Click the option of your choice.

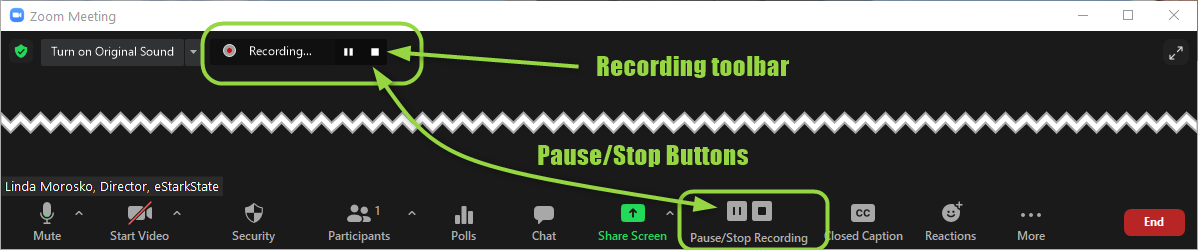
- Once you press either option, the Recording tool will appear at the top of the screen in Zoom. There’s a pause and stop button available in this toolbar. And, there are Pause/Stop buttons at the bottom of the screen as well.
- At the end of the session, you can either press the stop button, or exit Zoom. With either option, the recording will not be available until after the session. If you’ve chosen to “Record on this Computer,” when you begin the recording you may see the following message on your computer.

- When the meeting ends, the image below will appear and the meeting recording will be converted to an .mp4 file.

- Once the meeting is converted, then it will take you to a screen to save the file. Notice that a Zoom folder and a folder with the date and name of the class are created on my computer.

NOTE: These files shall not be uploaded to Blackboard. They MUST be uploaded to either Ensemble or YouTube.
- You will be able to either upload the file to the College’s streaming media server, Ensemble (you’ll find information on that in mystarkstate on the Help Desk tab under Faculty/Staff Help > Streaming Media. You can also upload them to YouTube. You’ll find documentation on uploading video files to YouTube in this article. The information you need will begin in the section .PPT to YouTube.
Auto Record
- When you setup the virtual session, you have the option in the Meeting Options section to “Record the meeting automatically. Choose this option means that recording will begin when you start the virtual session in Zoom. Again, choose whether it’s saved in the cloud or on your computer.

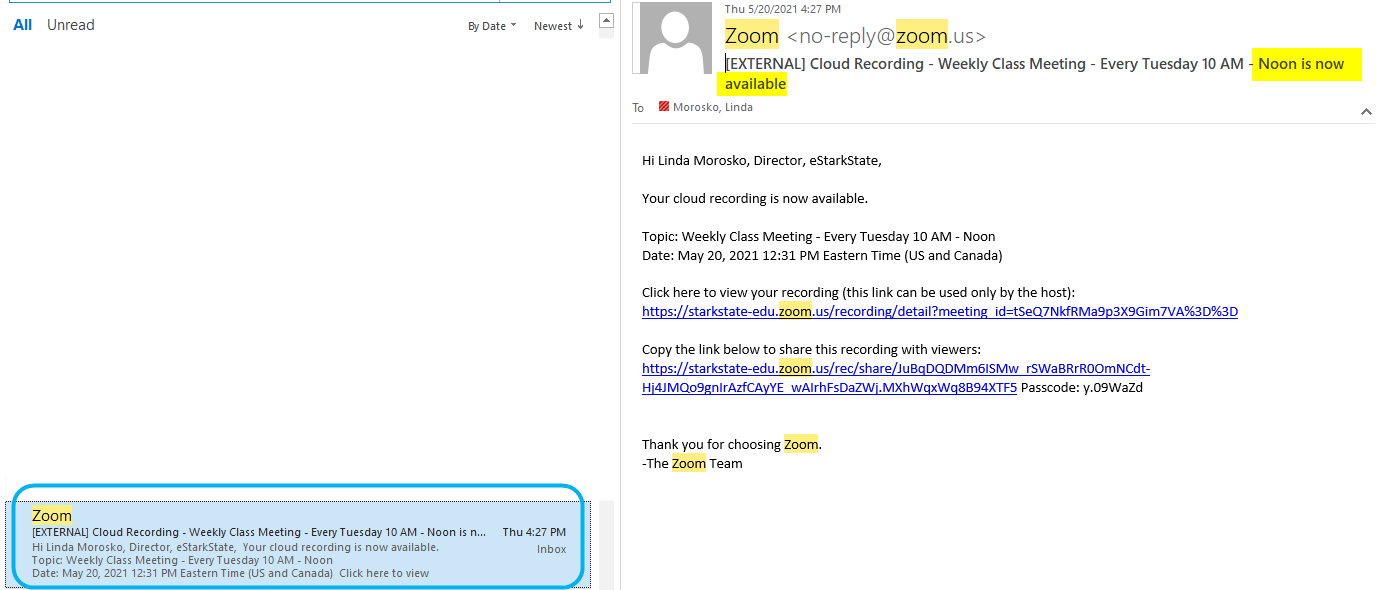
- With this option chosen, when the meeting begins, so does the recording. You do need to choose which method of recording you want, on the computer or in the cloud. If you choose the cloud, the recording will be uploaded to Zoom, and you will receive an email within a few hours alerting you that the recording is ready. It will look like the one below. Note: The recording is NOT immediately available. It could take up to eight (8) hours to appear.
- The recording is available from either inside of Blackboard, or outside using the Stark State College Zoom link. If you are in Blackboard, the screen will look like this:

If you are viewing it using the College’s Zoom link, the screen looks like this:

NOTE: CHROME is the HIGHLY recommended browser for this section.
- From inside Blackboard, you will click the Cloud Recordings link to go to that screen. Then, click the class session you recorded.

- The listing of available recordings will appear. Choose Copy shareable link for the link to copy to the Lessons page in Blackboard.

- Once you have the link copied, go to the Lessons page and the Materials folder to which you’re adding the video. Name the video and paste in the URL you copied in the previous step. Save it and it will now be available for your students to view.

Recording and sharing your lectures is very easy in Zoom.
~eSS