You can use tests and surveys to measure student knowledge, gauge progress, and gather information from students. You can create tests in content areas, learning modules, lesson plans, and folders. NOTE: When you create a test, a Grade Center column is created automatically.
Directions:
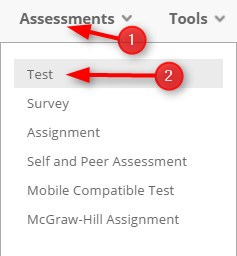
1. Click Assessments
2. Click Test
3. Click Create to create a New Test. NOTE: you can also link to an existing test if you already have a test created.

4. Type the name of the test, add the description and instructions.

5. Click the Submit button.

6. Add questions
a. You have three options
i. Create Question, Reuse Question, or Upload Questions
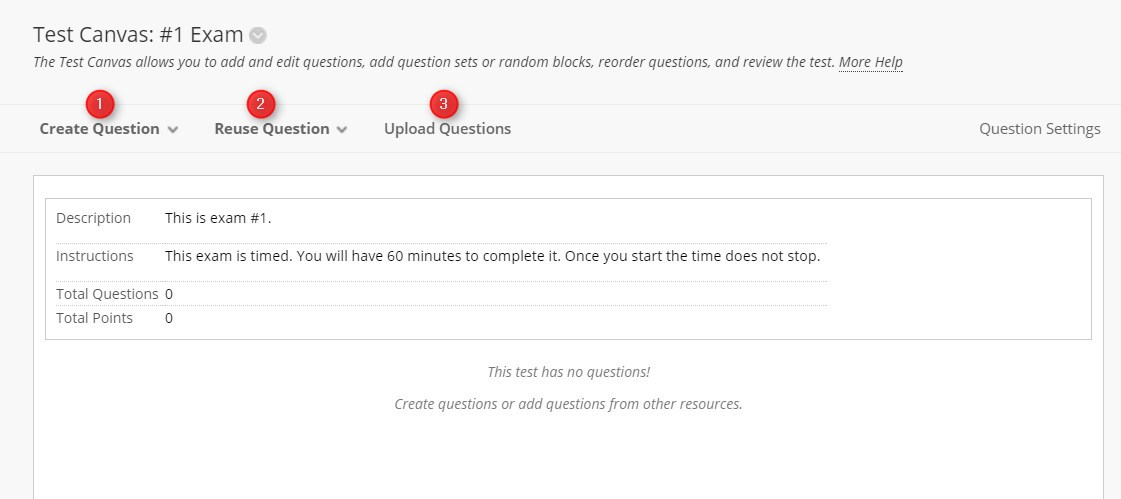
1. Create question – New questions can be created by using the Create Question drop-down list.
2. Reuse Question – You can create a question set, random blocks or find questions
3. Upload Questions – Questions can also be added to the test from a local file by clicking the Upload Questions button.
7. Click OK once you have added questions. NOTE: You can add more questions later.

Once you create a test, you need to Add an Existing Test to the course.
8. Click the test you just created. In our example, it is #1 Exam and click Submit.

9. Preview the Test information – This information was created in steps 1-7.

10. Set the Test Availability options

11. Set the Test Availability (Part Two) – Timer and display dates.

12. Set up Test Availability Exceptions

13. Set Due Date

14. Set Self-Assessment Options (if necessary)

15. You can Show Test Results and Feedback to Students

16. Set Test Presentation options

17. Click Submit
