Bb Test Pool Generator – step-by-step tutorial pdf file
Click this link for the Free Bb Test Pool Generator website provided by Oklahoma Christian University.
Generate a Test Pool from a Word or Word Pad document
You can use this generator to create Test Pools that can be imported in the Blackboard.
Import a Test Pool into Blackboard
How do I import a test pool into Blackboard (Video)?
1. Go to your course Control Panel, click Course Tools and then Tests, Surveys, and Pools

2. Click Pools. NOTE: TestGen brings zipped files into Pools not tests. You will have to create a Test using a Pool. (See instructions at the end of this document)

3. Click Import Pool

4. Click Browse My Computer

5. Find your test, select it, and click Open. NOTE: When you saved your file, if you didn’t change the location, TestGen will put it in the TestGen folder in MyDocuments.

6. Click Submit

7. Your Pool is ready to be used to make a Test.

Build a Test using a test pool
1. Go to Test, Surveys, and Pools and click Build Test.

2. Type the Name, description, Instructions and click Submit

3. Click Reuse Question and then click Find Questions

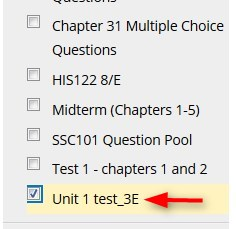
4. In the Browse Criteria, click Pools

5. Select the Pool you want to use.
6. Select all questions or individual questions. Don’t forget to check each page of the test pool to get all the questions.

7. After you select all the questions, click Submit

After reviewing the test, click OK.

Now you can add this test to your lessons page. You will need to deploy the test. Deploy means that the test was added to the lessons page.
Click here for instructions on how to Deploy a Test