Directions
Create an TestGen test.
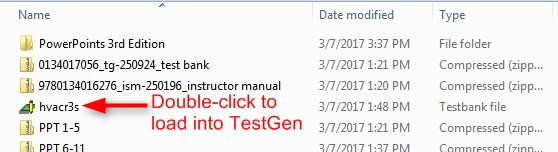
1. Once you get the TestGen package from a publisher, unzip it and double-click it. This will place it in the TestGen system.
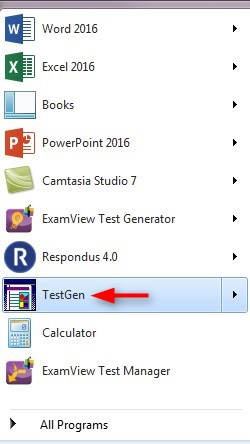
2. Open TestGen. If you do not have Test Gen, check the zipped file you downloaded from the publisher for a copy of TestGen.
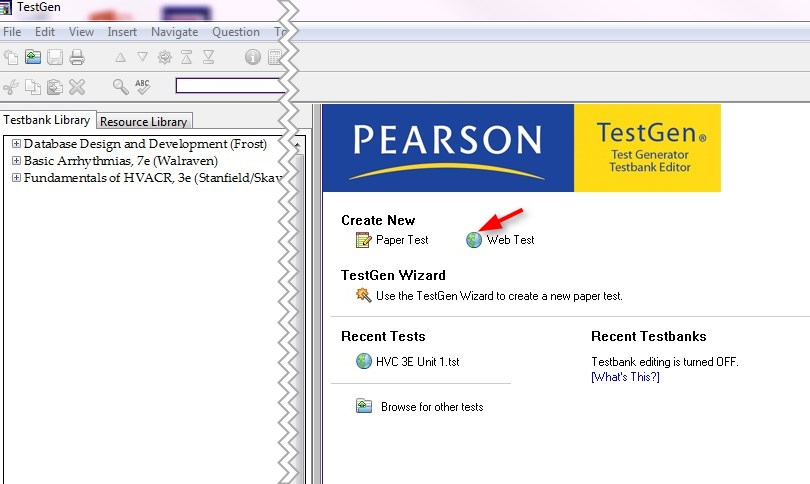
3. Click Web Test.
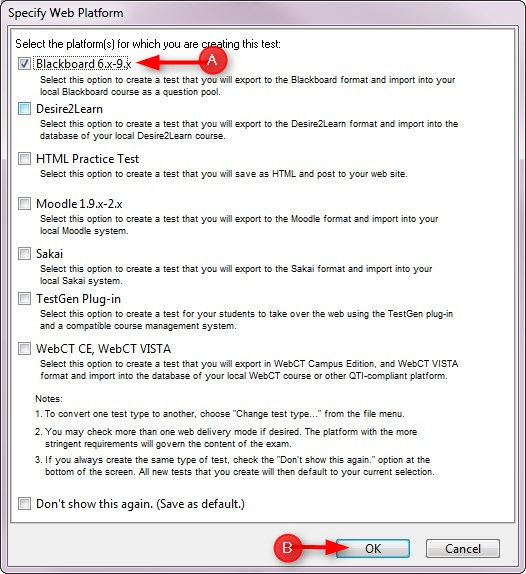
4. Click Blackboard 6.x-9.x and then click OK.
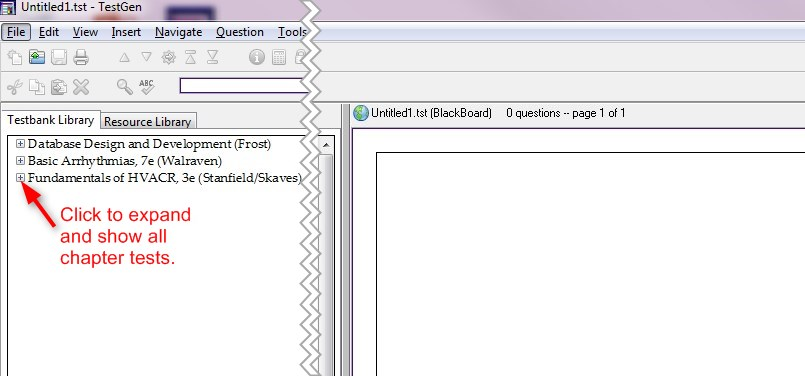
5. On the book’s test bank, click the “+” to expand the list of chapter tests.
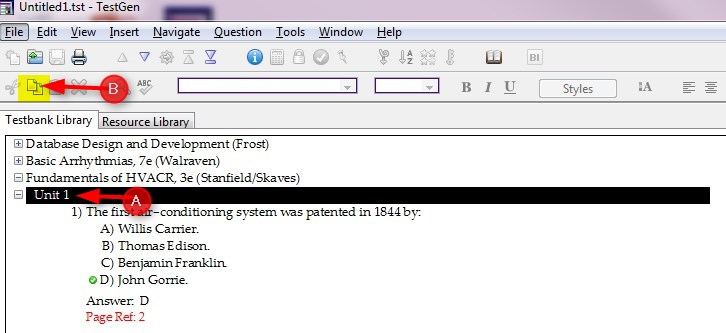
6. Select the Unit or Chapter test and then click the Copy icon.
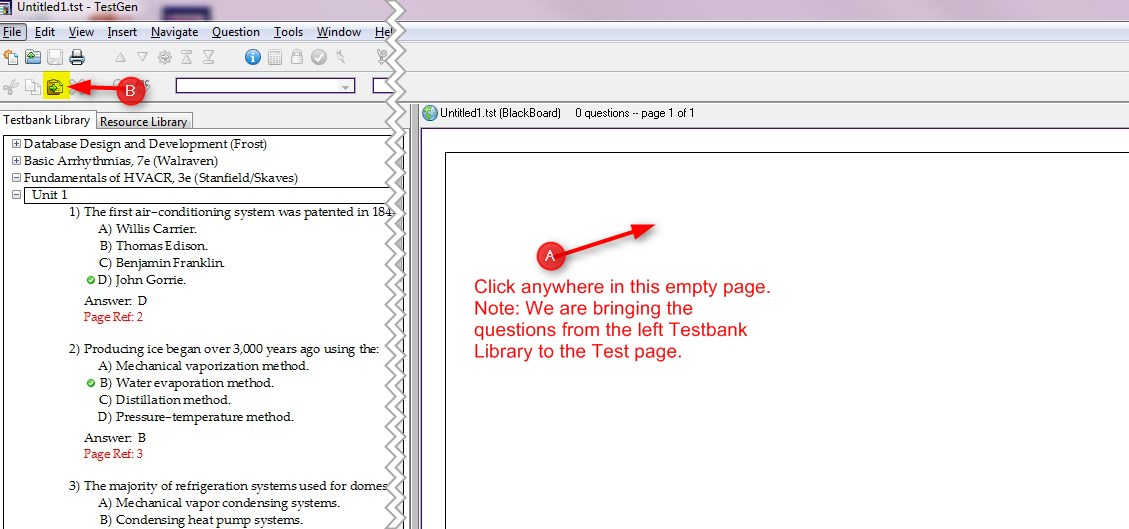
7. Click anywhere in the right empty page and then click the Paste icon.
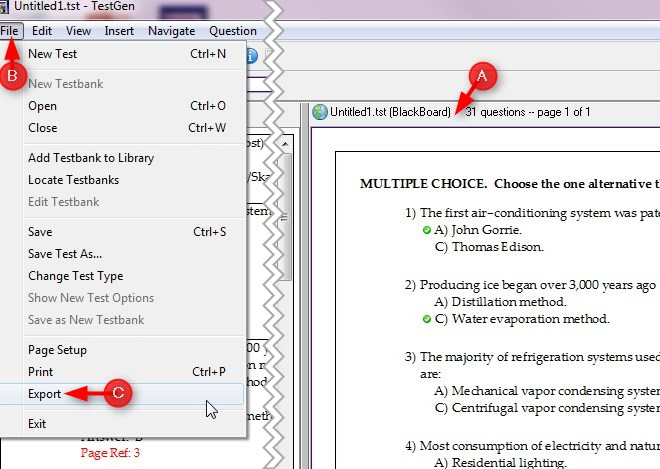
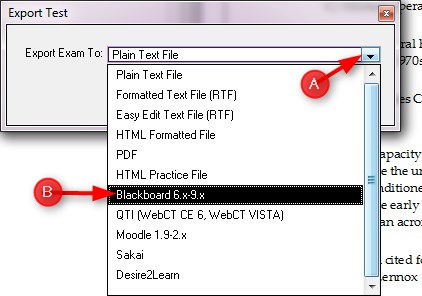
8. Once you have copied all the questions for the test, click on the Untitled header bar, click File and then Export
9. Click down arrow and select Blackboard 6.x-9.x
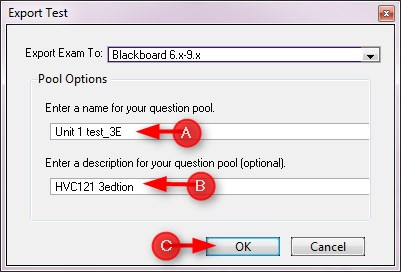
10. Type the name of the test, a description, and then OK
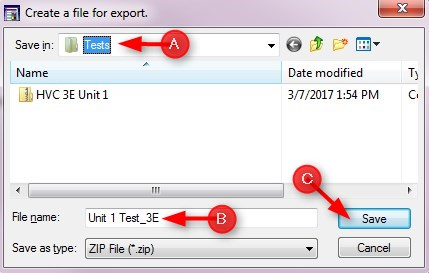
11. Choose where to save the file. Name the file and click Save.
Import the TestGen Test into Blackboard
1. Go to your course Control Panel, click Course Tools and then Tests, Surveys, and Pools

2. Click Pools. NOTE: TestGen brings zipped files into Pools not tests. You will have to create a Test using a Pool. (See instructions at the end of this document)

3. Click Import Pool

4. Click Browse My Computer

5. Find your test, select it, and click Open. NOTE: When you saved your file, if you didn’t change the location, TestGen will put it in the TestGen folder in MyDocuments.

6. Click Submit

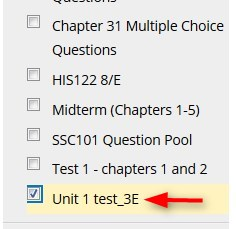
7. Your Pool is ready to be used to make a Test.

Build a Test using a test pool
1. Go to Test, Surveys, and Pools and click Build Test.

2. Type the Name, description, Instructions and click Submit

3. Click Reuse Question and then click Find Questions

4. In the Browse Criteria, click Pools

5. Select the Pool you want to use.
6. Select all questions or individual questions. Don’t forget to check each page of the test pool to get all the questions.

7. After you select all the questions, click Submit

After reviewing the test, click OK.

Now you can add this test to your lessons page. You will need to deploy the test. Deploy means that the test was added to the lessons page.
Click here for instructions on how to Deploy a Test