Directions
Create an ExamView test.
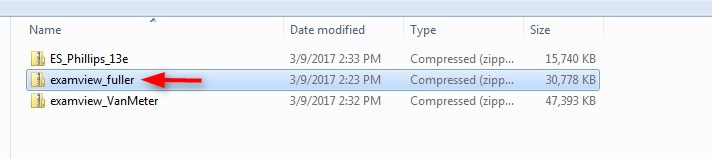
1. Find the ExamView zipped file you downloaded.
2. Click the Setup File to load the test into ExamView. NOTE: If you don’t have ExamView installed, click the EVPlayer and use the setup file to installed ExamView.

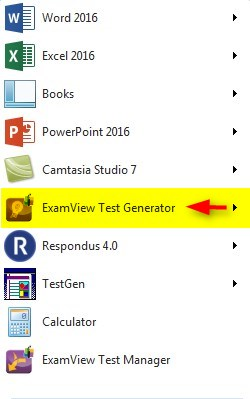
3. Open the ExamView Test Generator.
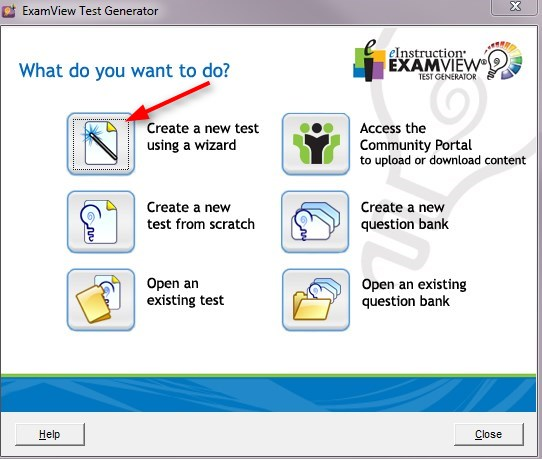
4. Click Create a new test using a wizard.
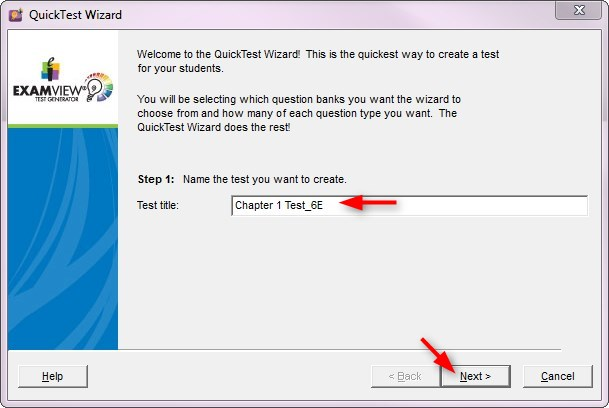
5. Type the Test title and then click Next. NOTE: You will want to be very specific and include the edition.
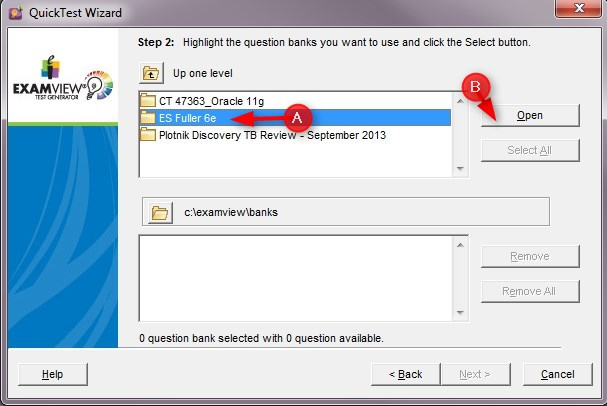
6. Select the test bank and click Open
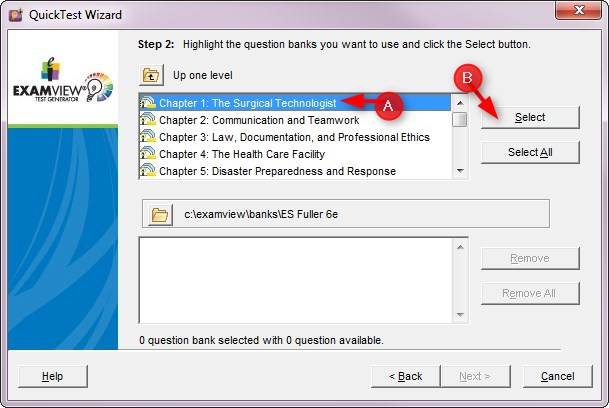
7. Select the chapter and click Select
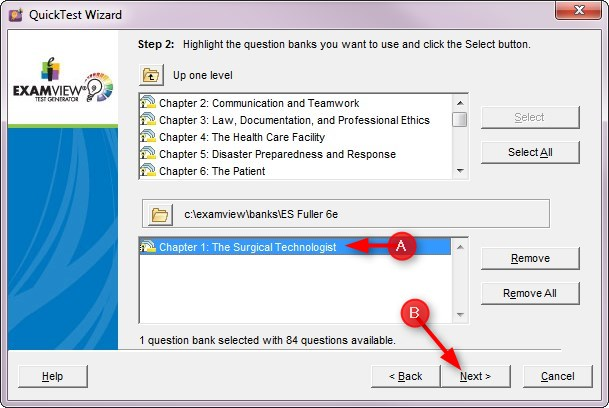
8. Select the chapter and click Next
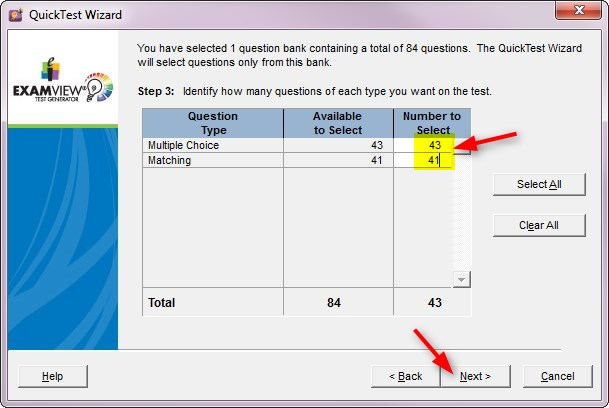
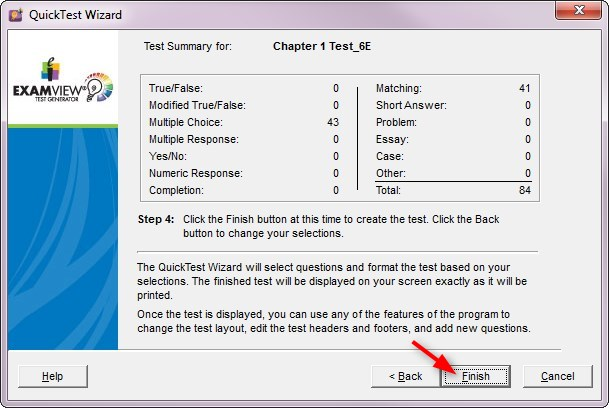
9. Type the Number to Select to use for the test and then click Next
10. Click Finish
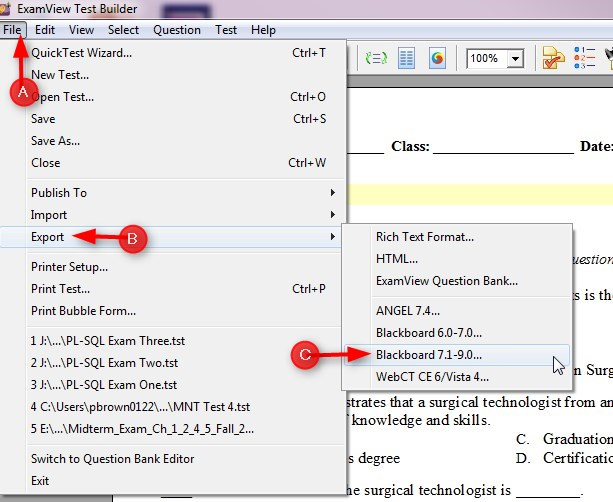
11. Click File/Export/Blackboard 7.11-9.0….
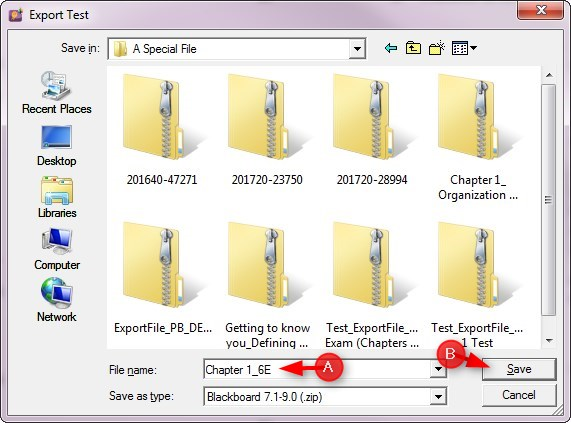
12. Save the file in a specified location. Name the file and click Save
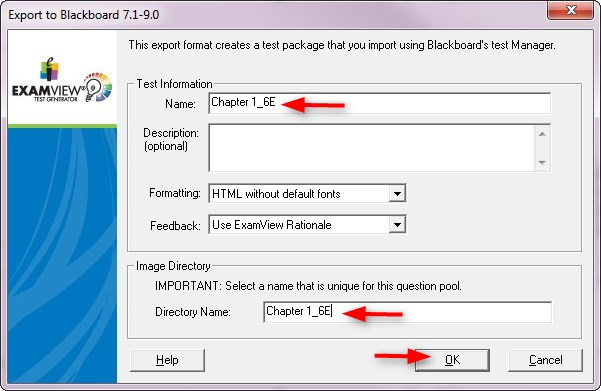
13. Type the name for the test and the directory name. They should be the same. Click Ok
Import the ExamView Test into Blackboard
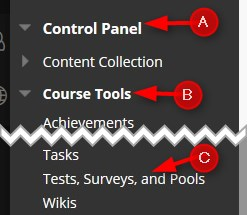
1. Go to your course Control Panel, click Course Tools and then Tests, Surveys, and Pools
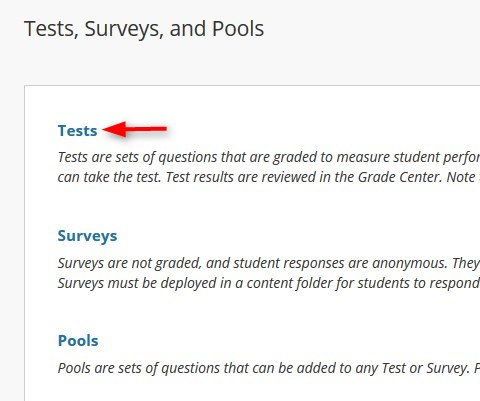
2. Click Tests
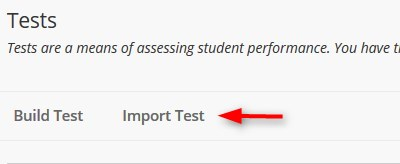
3. Click Import Test
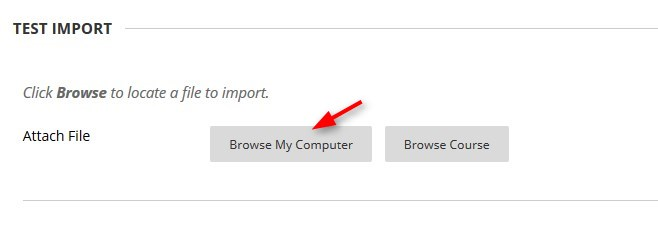
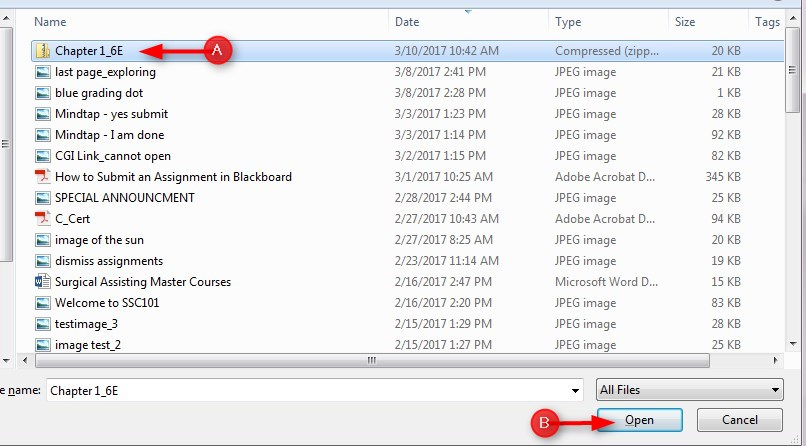
4. Click Browse My Computer
5. Find your test, select it, and click Open.
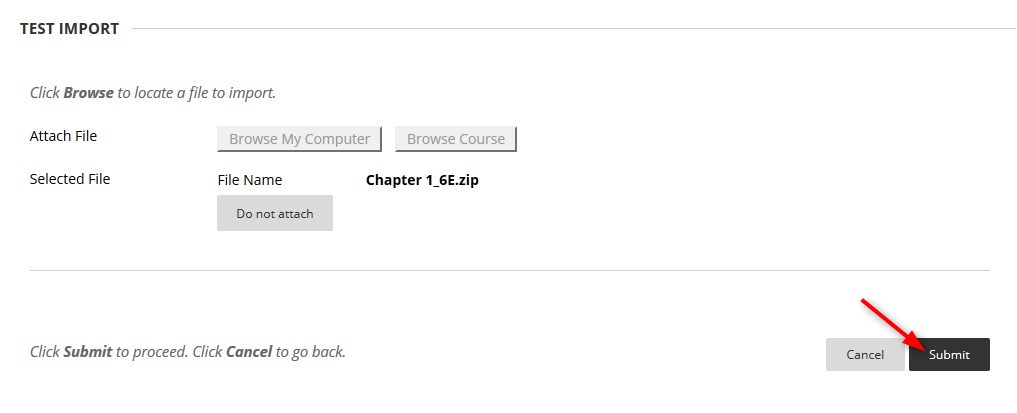
6. Click Submit
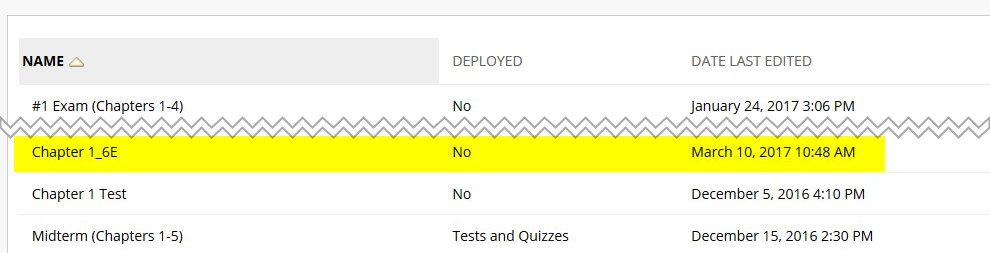
7. Your test is ready to be deployed in your course. Deployed means that you have added it to your lessons page.
Click here for the page with instructions on how to Deploy a Test.