Uploading Respondus Files to Bb – Step-by-step tutorial .pdf file
Once the test has been created in Respondus, you’ll want to upload it to Blackboard.
Directions:
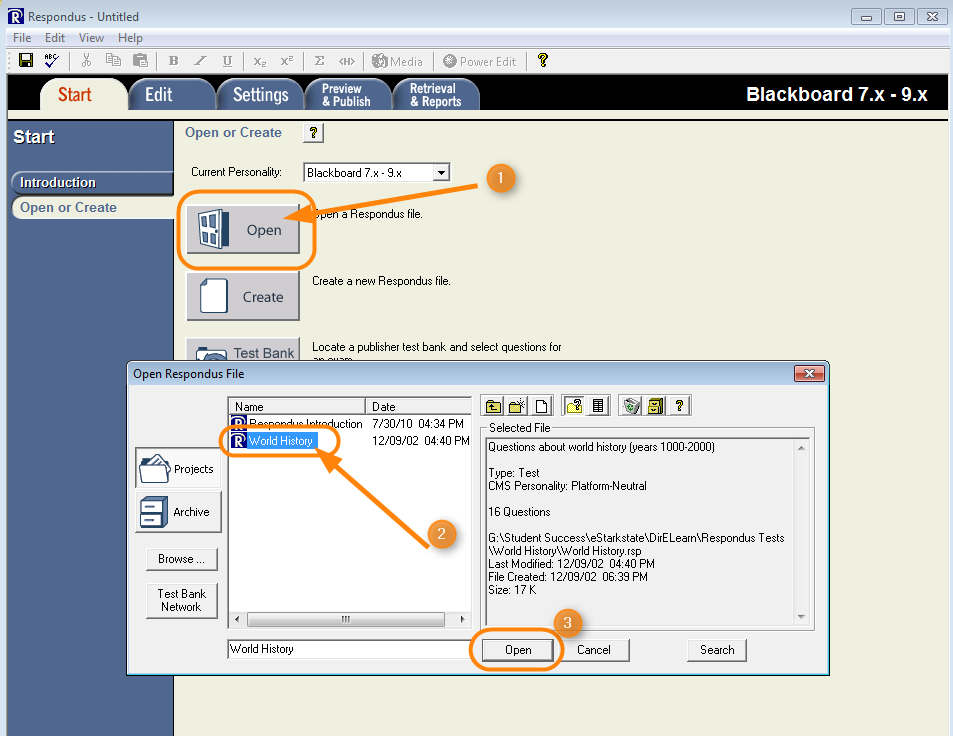
- Open the Respondus software on your computer and then open the test you created.
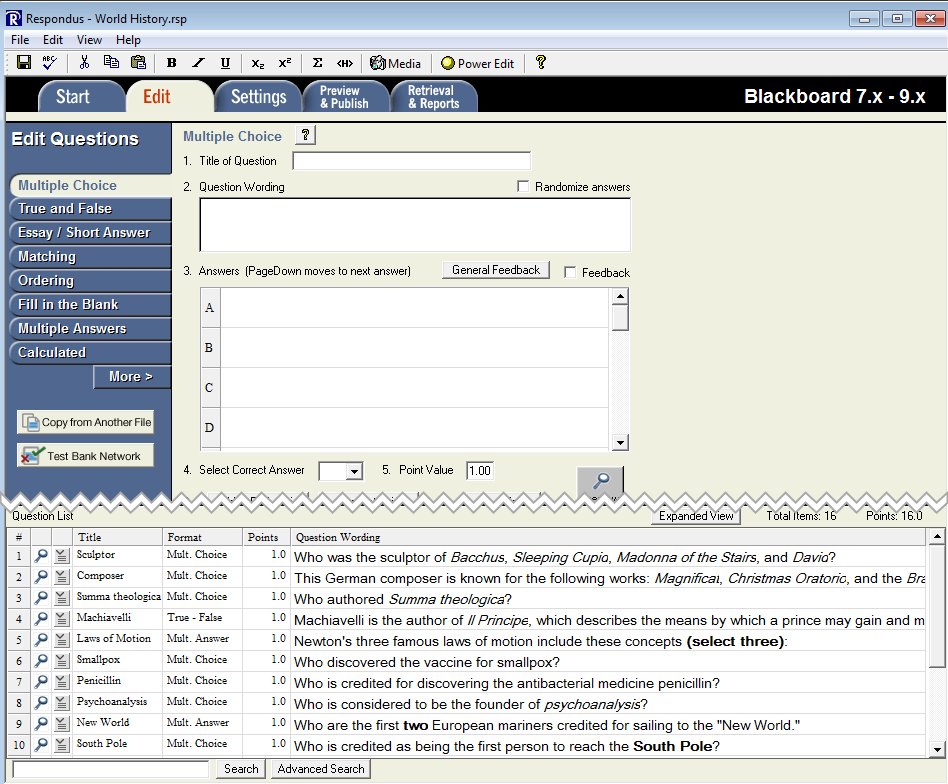
- The test content will appear in the next window.
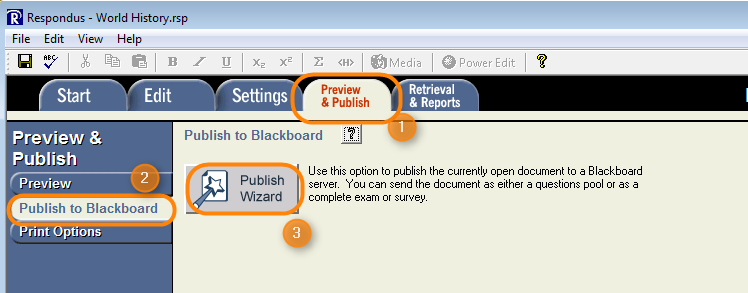
- Click the Preview & Publish tab (1) and then choose the Publish to Blackboard (2) link on the left side of the screen. Then click the Publish Wizard button (3).
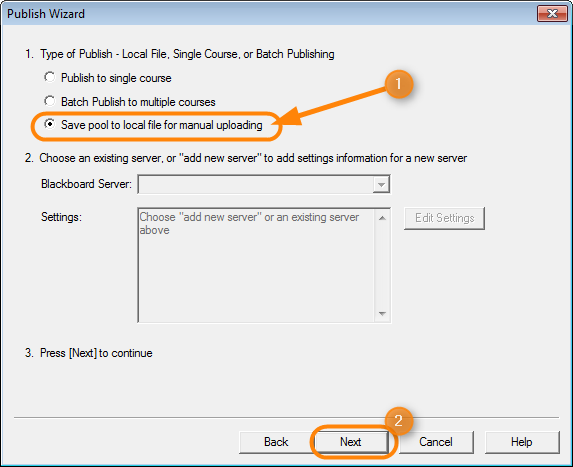
- On the Publish Wizard screen, click the Save pool to local file for manual uploading radio button. Then click the Next button.
- Click the Save As button, then when the Save As dialogue box opens, navigate to the location you want to save your tests and click the Save button.
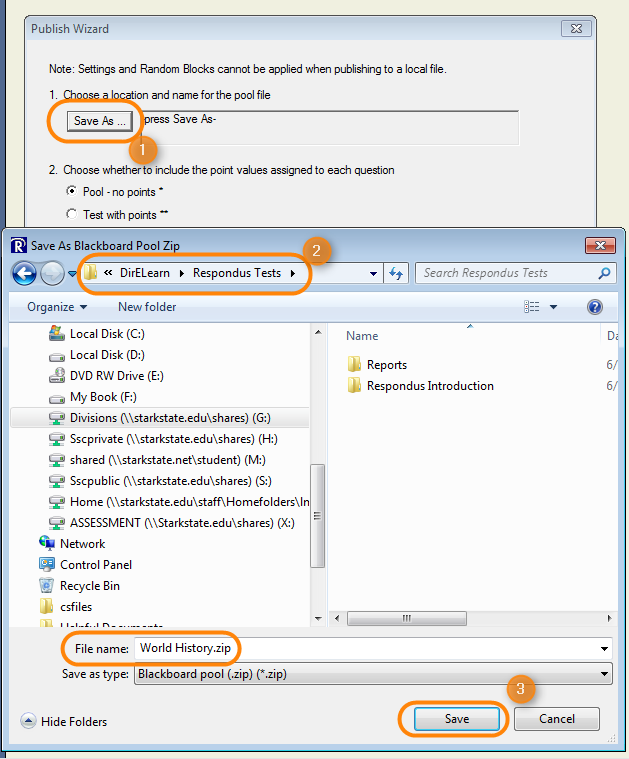
- You’ll see the location string in the Save As window. Use this to verify you’re saving the file in the correct location. In item 2, choose whether this is a Question Pool or a Test with points. Finally, click the Finish button.

- Next, open the course in Blackboard to upload the test.
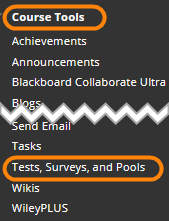
- Navigate to the Course Tools and choose Tests, Surveys, and Pools.
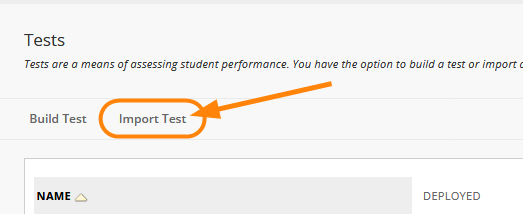
- Choose the Import Test option.
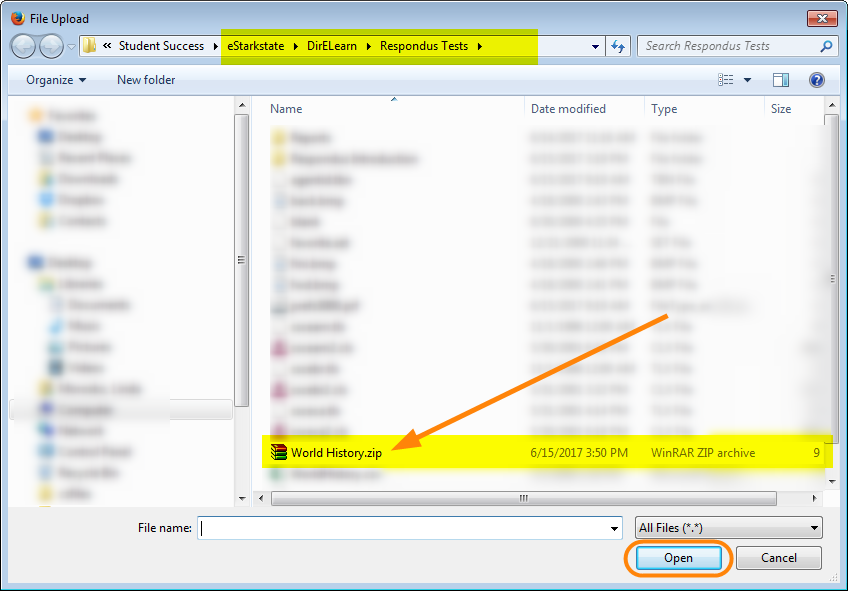
- Click the Browse My Computer button to Locate the saved .zip file on your computer (Step 5 above).
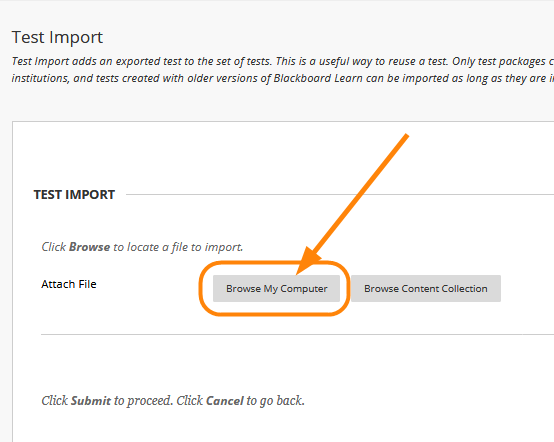
- Find the file, click the file name and click the Open button.
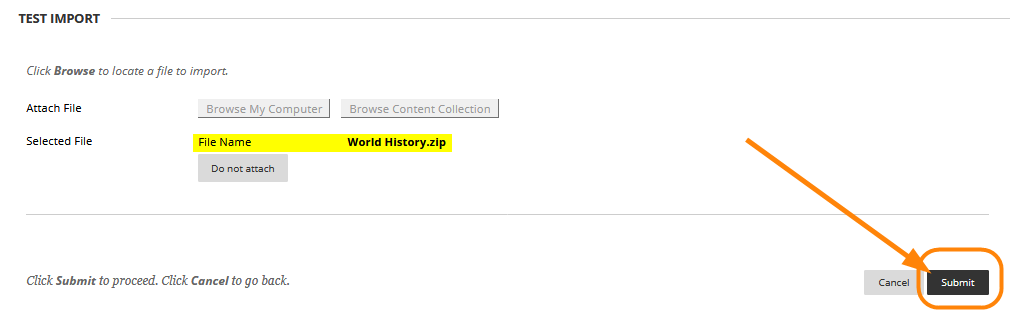
- Verify the file name and then click Submit.
- When the test has been imported, the following screen will appear:
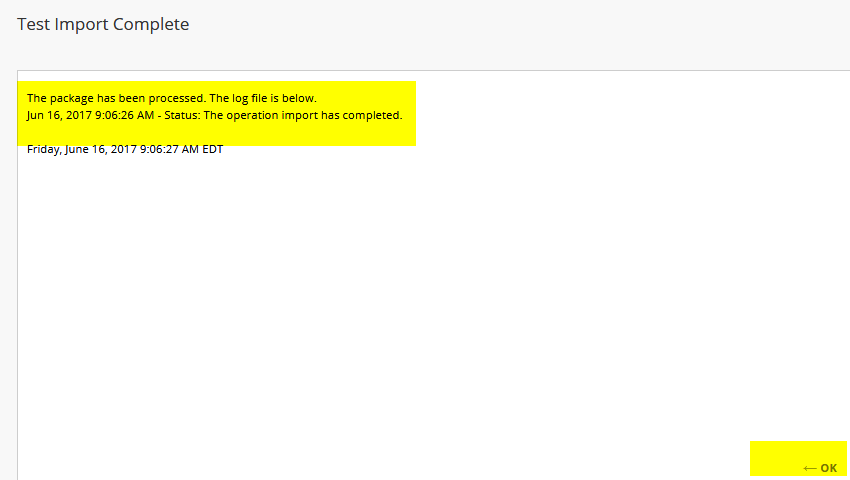
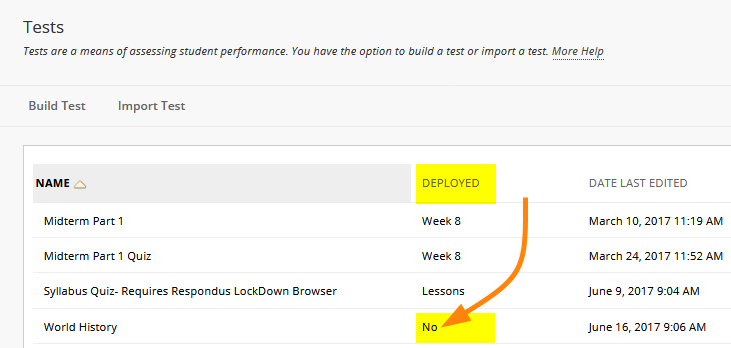
- Click OK and the test will be displayed on the Tests screen.
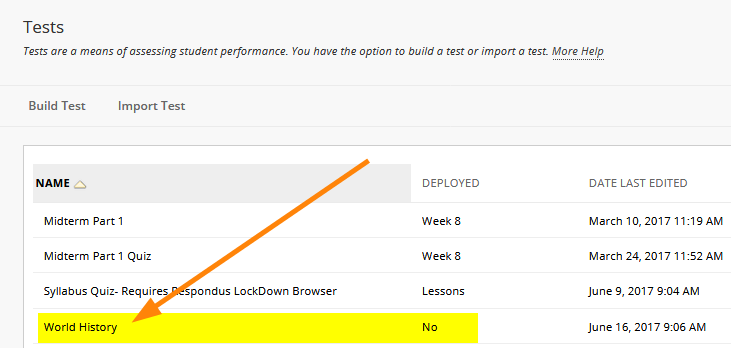
- Notice that this test is set to “No” in the Deployed column. In order for the test to be accessible to students, it must be deployed.
- Click this link to follow our instructions on deploying a test.
- If you want to review the questions, click the chevron and choose Edit to look at the questions in Blackboard. For more editing information, see the instructions on how to Add a Test.